
CalibTable Generator
Overview
This feature generates a complete fuel tank calibration table from just three refuels. The user only needs to select the tank shape, enter the tank height and the sensor height after cutting, and the fuel level and litres of each refuel; the app calculates all points of the table automatically, with no need to fill in small increments and manually record each point. Available from app version 2.2.4.
The table generator has two modes:
| Mode | Description | Sensor connection | Output |
|---|---|---|---|
| Standalone | Refuel data is already available, or preparing a table for LIGO AIR, LIGO MAX, LIGO PRO BLE | Not required | CSV file |
| Sensor Live | Calibrate directly on the vehicle while connected to a LIGO AIR or LIGO PRO BLE / PRO 2(S) sensor | Required | Written directly to the sensor or to a CSV file |
Supported tank shapes:
-
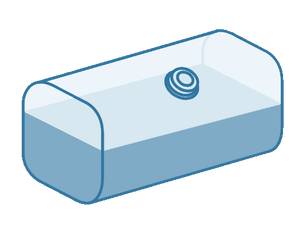 Parallelepiped
-
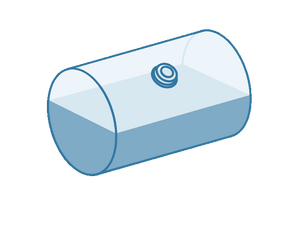 Cylinder
-
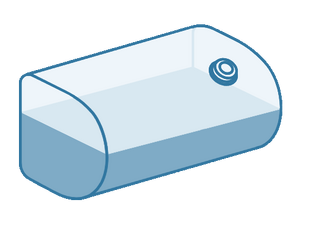 D-shape


Preparation
- The fuel tank is empty or fully drained.
- The sensor has been cut to the correct length and installed on the tank.
- A tool to accurately measure the litres added is available (a metered pump or a calibrated measuring container).
- The two tank dimensions are known:
- H – Tank height (cm): the internal height of the tank at the sensor mounting position, measured from the bottom.
- L – Sensor height (cm): the length of the sensor after cutting, measured from the lower edge of the aluminium tube to the underside of the sensor base.
The difference d = H − L is the bottom gap; fuel below the probe tip is not measured by the sensor.
Three-refuel plan:
- Refuel 1 (offset): starting from an empty tank, fill to about 5–10 % of the tank volume.
- Refuel 2: fill to about 40–60 %.
- Refuel 3: fill the tank completely (100 %).
Note: For each refuel, record only the litres added in that refuel; do not accumulate the litres from previous refuels.

Opening the Calibration Table Generator
Standalone Mode
- Open the app; on the Bluetooth Products page, select CALIBTABLE GENERATOR.
- The CalibTable Generator page opens; no sensor connection is required.
Sensor Live Mode
- Connect the LIGO AIR or LIGO PRO BLE sensor as usual.
- Go to the Settings tab > Calibration Table > Auto Calibration.
The page looks the same as in Standalone mode, with an additional Fuel level from sensor line showing the live reading from the sensor.
Note: The Manual Calibration item in the same menu is used to build a multi-point calibration table manually; this document covers Auto Calibration only.
-
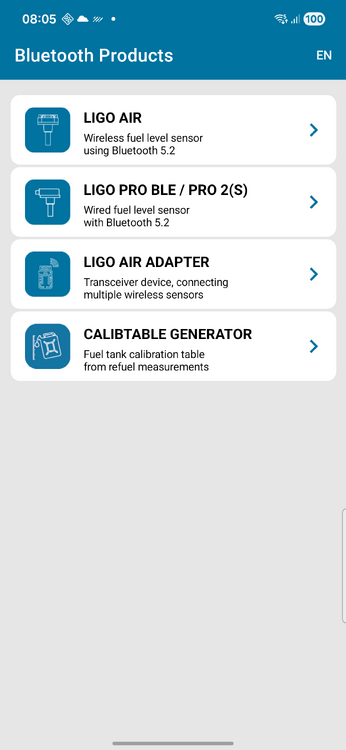 Figure 2. CALIBTABLE GENERATOR on the Bluetooth Products page
-
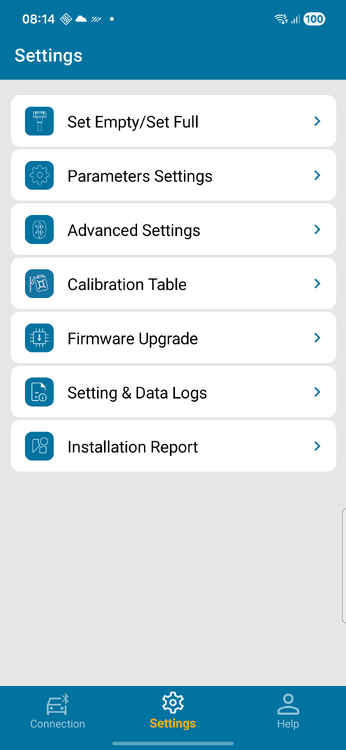 Figure 3. Settings > Calibration Table
-
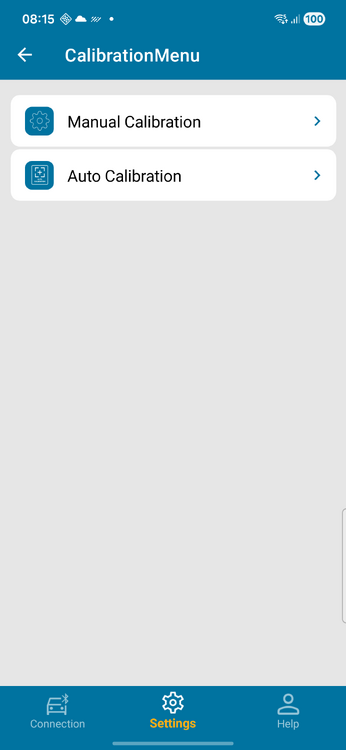 Figure 4. Calibration Table menu


Step 1 – Tank Type and Dimensions
- Select the tank shape: Parallelepiped, Cylinder or D-shape.
- Enter Tank height (H) and Sensor height (L) in cm (decimals are accepted, e.g. 60.5).
- The app automatically calculates Bottom gap: d = H − L.
- L must not be greater than H.
- Tap the ⓘ icon next to each field to view a short explanation.
-
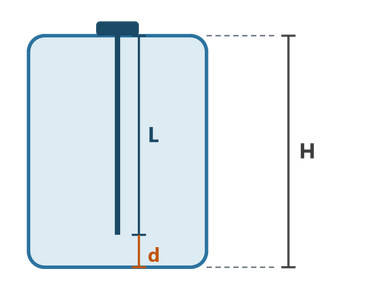 Measuring H, L – rectangular box
-
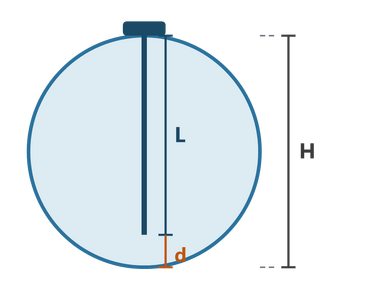 Measuring H, L – horizontal cylinder
-
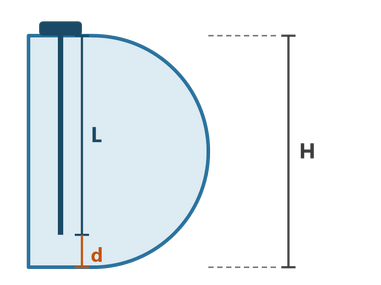 Measuring H, L – D-shape


Step 2 – Refuel Calibration
The refuel table has three rows, one per refuel (row 1 starts from an empty tank). Target fill levels for each tank shape:
| Refuel 1 (offset): 5–10 % | Refuel 2: 40–60 % | Refuel 3: full (100 %) |
|---|---|---|
 |
 |

|
Refuel table columns:
| Column | Description |
|---|---|
| Fuel level start | Taken automatically from the Fuel level end of the previous row; the first row is always 0. |
| Fuel level end | Fuel level reported by the sensor after the refuel, in sensor units (0 – 4095). |
| ΔV (L) | Litres added in this refuel (not cumulative). |
For each refuel:
In Standalone Mode (the user already has the refuel data)
Enter the existing data of the 3 refuels into the 3 corresponding rows 1st refuel, 2nd refuel, 3rd refuel (including the Fuel level end and the corresponding litres of that refuel).
Reading the Fuel Level in Sensor Live Mode
- Fill to the target level for that row and wait for the fuel surface to settle.
- Read the fuel level from the sensor and enter it in Fuel level end.
- Enter the litres added in ΔV (L).
- Tap ⓘ next to the row name to view the target fill level illustration for the selected tank shape.
- When you enter Fuel level end, the tank illustration in Step 1 shows an estimated % mark, helping you check whether the value is reasonable.
The Fuel level from sensor line above the refuel table shows the live reading with its status:
- Stable (green): enter this value in the Fuel level end of the current refuel.
- Unstable (red): the fuel surface is still moving – wait longer before recording.
Rows Highlighted in Red
A refuel row turns red when Fuel level end ≤ Fuel level start, Fuel level end > 4095, or ΔV ≤ 0. Correct the values in that row before generating the table.
Step 3 – Export the Table
- Select Sensor type; the number of calibration points is set automatically according to the sensor.
- To use a different number of points: select Custom and enter it in Calibration points (custom); the points are distributed evenly over the 0 – 4095 range.
- Tap Generate calibration table. If the data is invalid, a red message box appears above the button (see the Error Messages section).
| Mode | Sensor type options |
|---|---|
| Standalone | LIGO AIR (50 points), LIGO PRO BLE (30 points), LIGO MAX (100 points), Custom (2 – 200 points) |
| Sensor Live – LIGO PRO BLE | LIGO PRO BLE (30 points), Custom (2 – 30 points) |
| Sensor Live – LIGO AIR | LIGO AIR (50 points), Custom (2 – 50 points) |
-
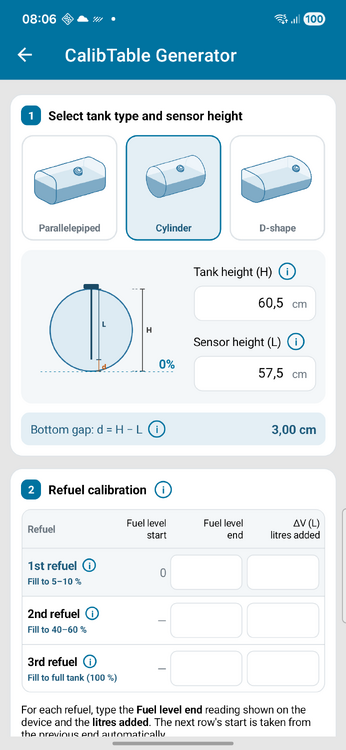 Figure 5. Step 1 – tank type and dimensions
-
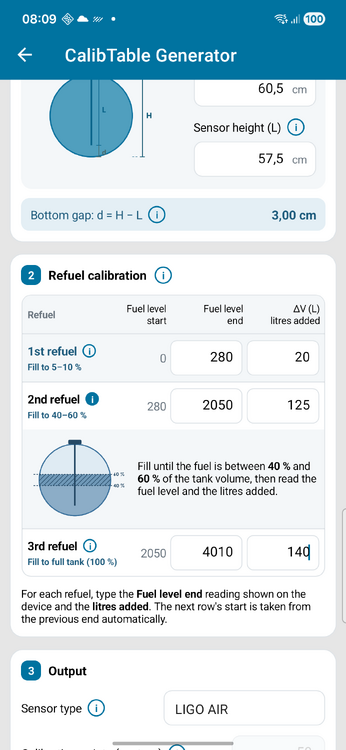 Figure 6. Step 2 – refuel calibration
-
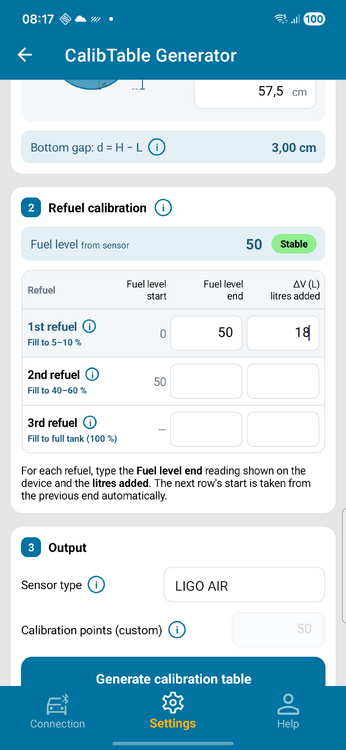 Figure 7. Fuel level from sensor (Sensor Live)
-
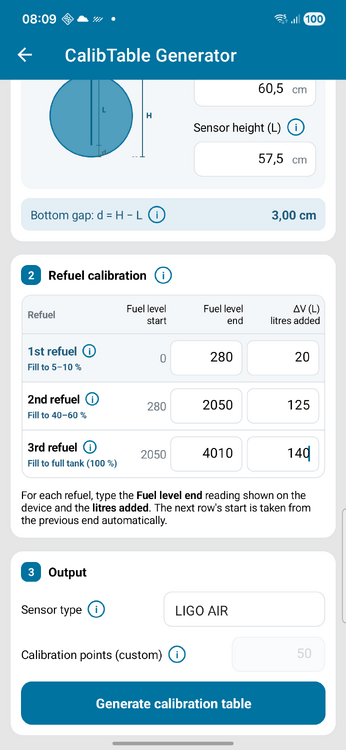 Figure 8. Step 3 – export settings


Results
The Results page shows:
| Item | Description | Item | Description |
|---|---|---|---|
| Tank shape | Selected tank shape | V(4095) | Volume at the maximum sensor level – the largest measurable volume (L) |
| Parameters | H, L and d | V(0) | Volume at level 0 |
| Calibration mode | Number of refuels used | Points | Number of points in the table |
| Offset | Fuel level and litres of refuel 1 |
The calibration table lists each point with the columns #, Fuel level, V (L) and Zone (zero, offset, refuel 2, refuel 3, full). Tap Chart (top-right corner) to view the volume-versus-fuel-level graph – the curve should rise smoothly, with no sudden jumps.
Download CSV File (Both Modes)
Tap Download CSV and choose a save location on the phone; the app shows Success with the file path. Use the file to load the table into LIGO MAX, keep installation records, or import it via Manual Calibration.
| Item | Value |
|---|---|
| File name | yyyyMMdd_HHmmss_<points>points_<tank>_H<H>_L<L>.csv, e.g. 20261103_101530_50points_cylinder_H60.5_L57.5.csv |
| Columns | No, Volume (liter), Level |
| Limits | Maximum 200 points; each volume value up to 65,535 L |
Save to Sensor (Sensor Live Mode Only)
Tap Save to sensor, select Yes in the "Would you like to save calibration points?" dialog and wait until "Calibration points saved successfully!" appears. For LIGO AIR, the app automatically enables the calibration table on the sensor after writing; no further setup is needed.
-
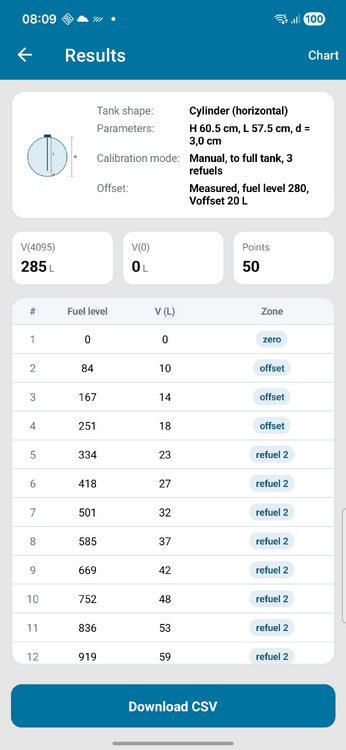 Figure 9. Results page
-
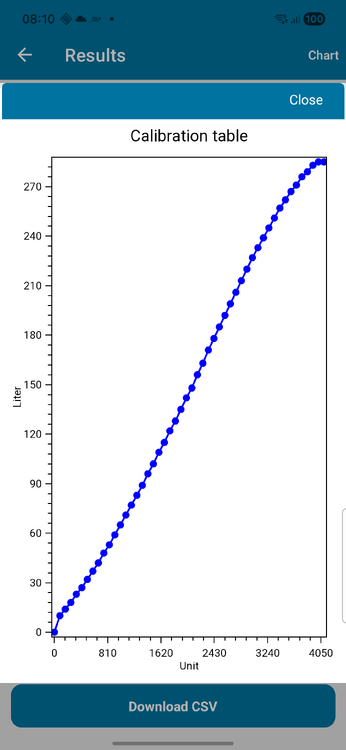 Figure 10. Calibration chart
-
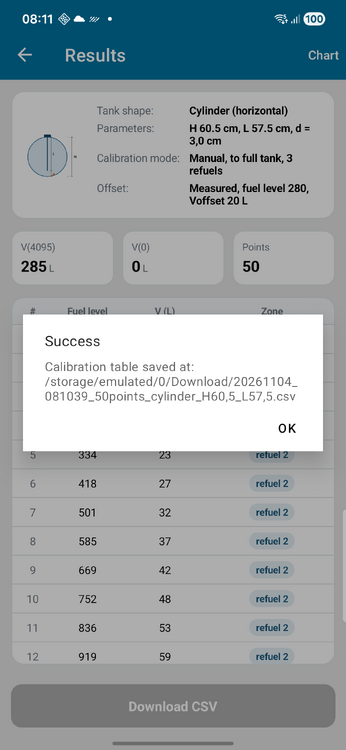 Figure 11. CSV file saved
-
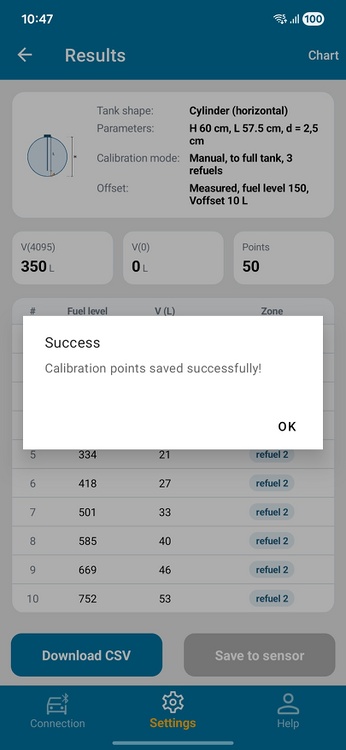 Figure 12. Table saved to the sensor


Error Messages

| Message | Cause | Solution |
|---|---|---|
| Tank height H is empty. / Sensor height is empty. | H or L has not been entered | Enter both values in Step 1 |
| Sensor height (…) cannot exceed tank height (…) | L is greater than H | Re-measure H and L |
| 1st refuel (offset): fuel level end is empty. (or litres added) | The refuel row is incomplete | Fill in all three rows in Step 2 |
| Fuel level offset must be within 1…4093. | Fuel level end of refuel 1 is 0 or too high | Check the reading after refuel 1 |
| Refuel N: fuel level end = X must be greater than fuel level start = Y. | The level after refuel N is not higher than before | Check the reading of refuel N |
| Refuel N: fuel level end cannot exceed 4095. | The value exceeds the sensor's measuring range | Enter a value from 0 to 4095 |
| Voffset must be greater than 0 / Refuel N: ΔV must be greater than 0. | Litres added is 0 or negative | Enter the correct litres added |
| Number of points must be within 2…<max>. | Custom number of points is out of range | Enter a value within the range in Step 3 |
| Total fuel volumn (…) cannot exeed 65535. | Total litres too large | Re-check the litres entered |
| Cannot export – LIGO MAX accepts at most 200 calibration points. | The table has more than 200 points | Regenerate the table with at most 200 points |
Related Documents
- Datasheet
- User Guide
- Certifications & Approvals
- Product Change Notifications
- Firmware Changelog
- Promotional Material
- Video
- Protocol
Revision History
Loading revision history...